The settings section is minimal at this moment as we are starting with the recruitment feature. As you might never need to adjust the company information and departments once created, we have kept them at the bottom and the recruitment section at the top.
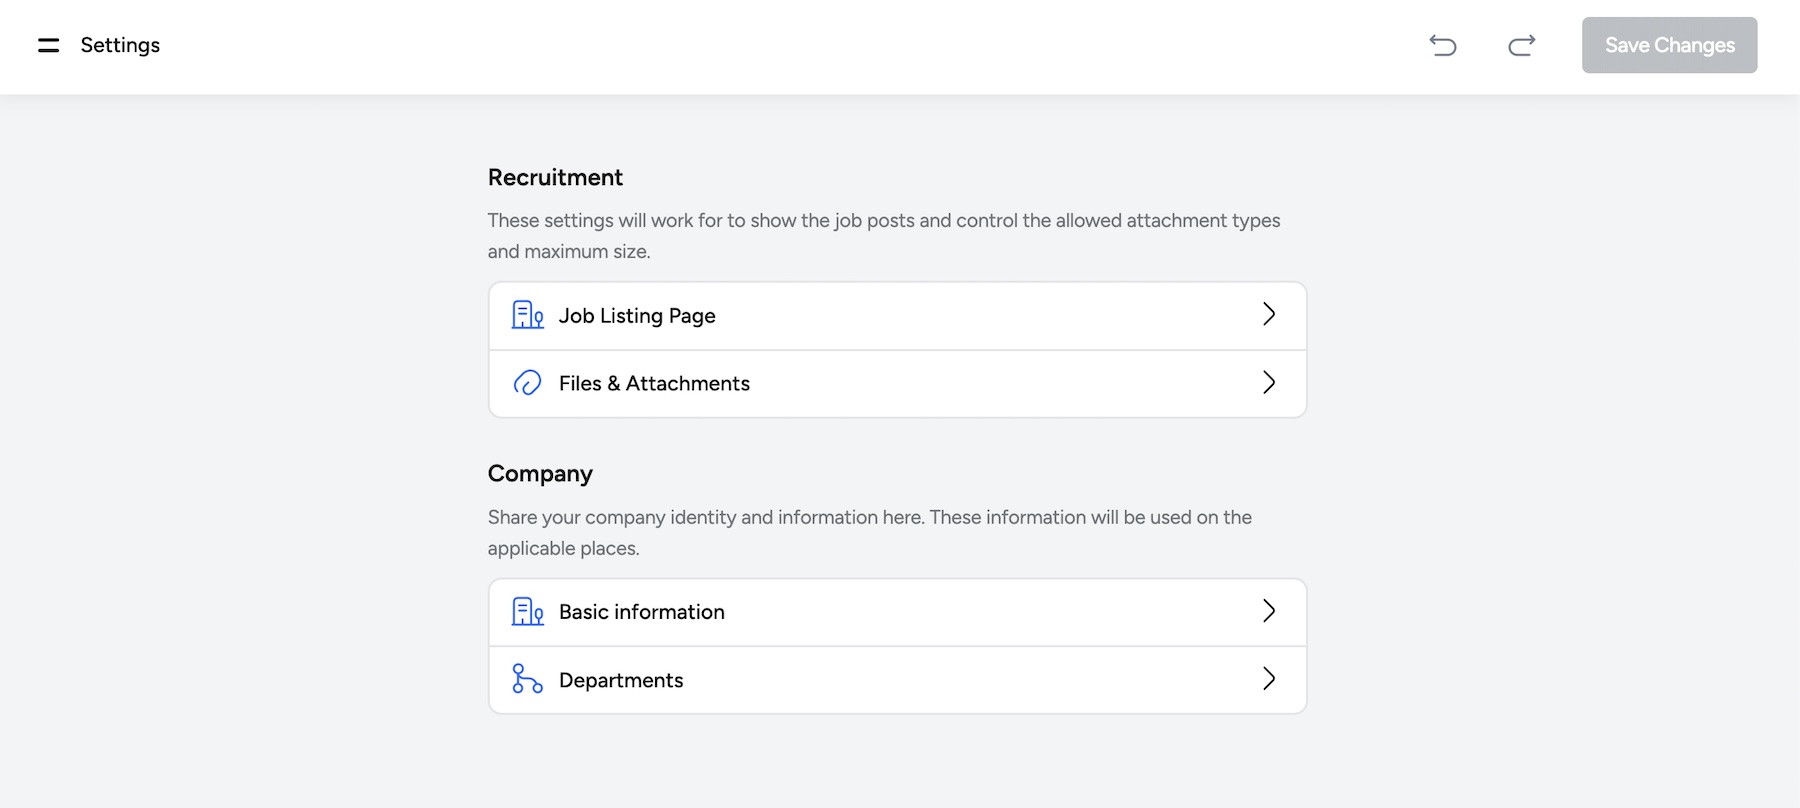
Table of Contents
Recruitment
Job Listing Page
The plugin creates a page to display all the active jobs on the site. You must select a page that will show all the job posts using the dropdown.
Banner Section: This switch enables a header section with a background image and some text on top of it.
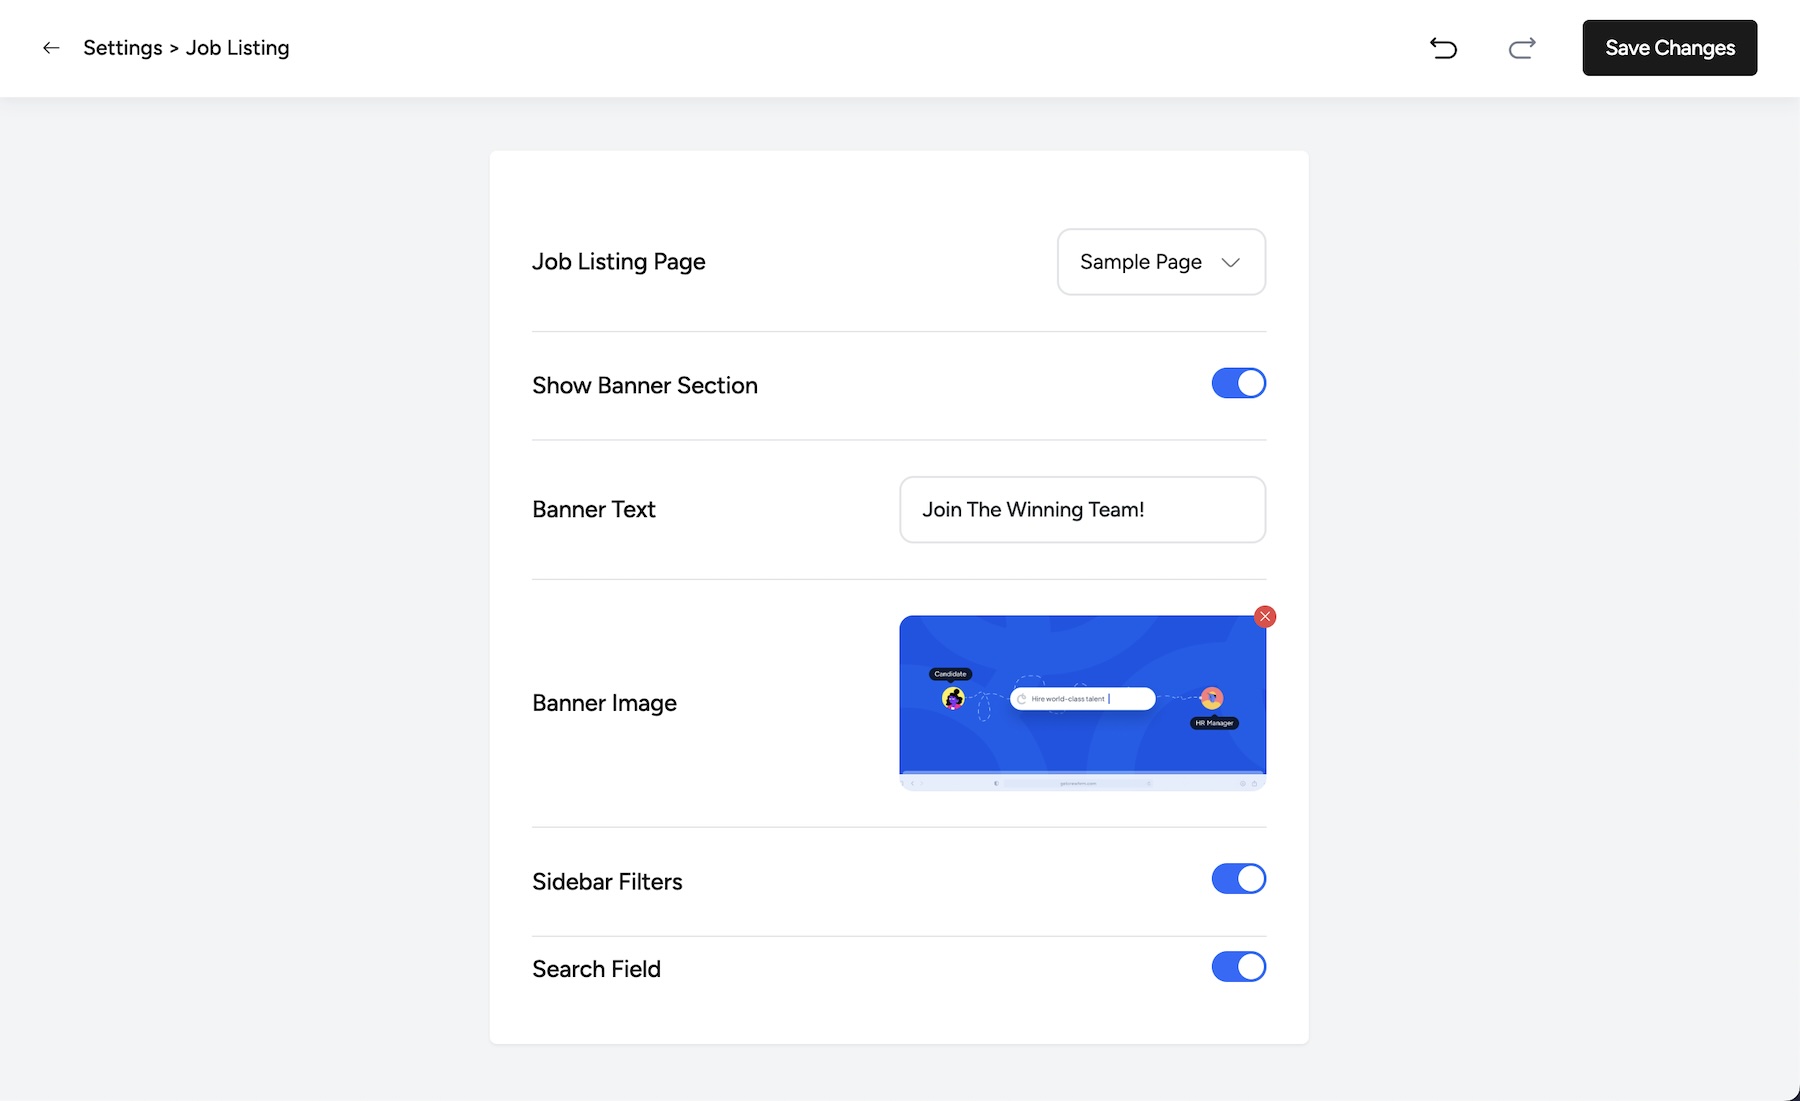
If you want to allow people to filter through job posts based on location, department, type of employment, etc, you can enable the sidebar filters. The Search field is shown at the top to help navigate job posts faster.
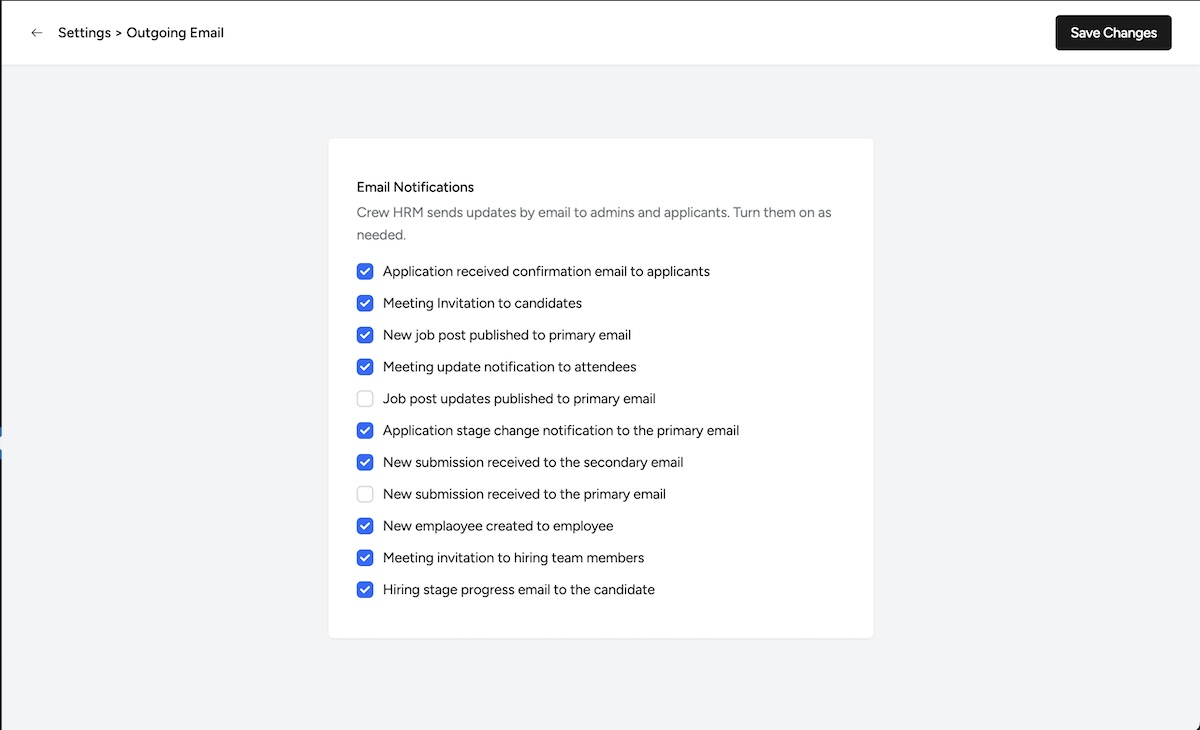
Outgoing Emails
Users and accounts within the CrewHRM system get email notifications about different activities. None of these email notifications are activated by default. You have to go through the list, read and understand what each email does, and activate them as you need.
The free version includes only 1 email notification sent to the applicants after submitting their information on the job application form. This helps them understand all the information inputted correctly, and they can reply to the email if they have questions.
In the Pro extension, we have additional email notifications.
Files and Attachment – Premium Feature
Candidates must upload their resume, cover letter, portfolio, work samples, etc, to stay ahead in the competition. You can select which file types you will accept from candidates.
Only PDF, DOC, and DOCX file types are supported on the free version of the plugin. You have to install the Pro add-on to accept additional file types.
You can set the total allowed limit for all files in the Attachment Size option. This field accepts values in Megabytes only.
Company
Basic Information
The information in this section will be reused in several documents and pages related to the HRM system. The HR Email will send out email notifications to employees and candidates. If your HR department has a central mailbox, it is best to use that. You can use your email if you are a small company owner. If you are a large organization, you should add the mailbox address that usually receives resumes and communicates with the candidates.
Departments
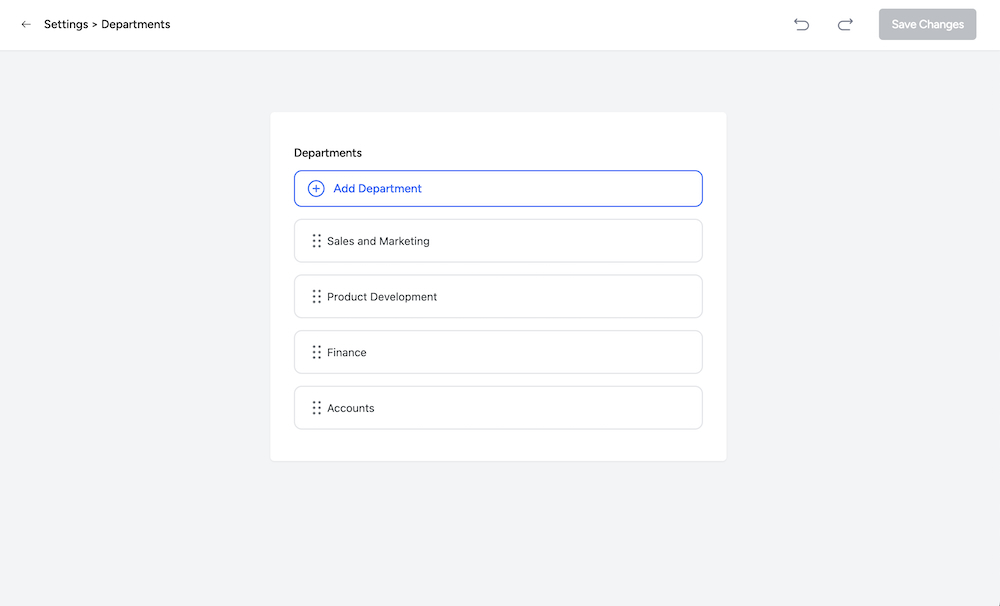
Here, you can add the departments you have in your company. If you want to reorder them for better access while creating job posts or displaying them on the jobs listing page, you can drag them by holding on to the six dots on the left side. Please remember to click the save button every time you make edits. They don’t save instantly or automatically.
White Label – Premium Feature
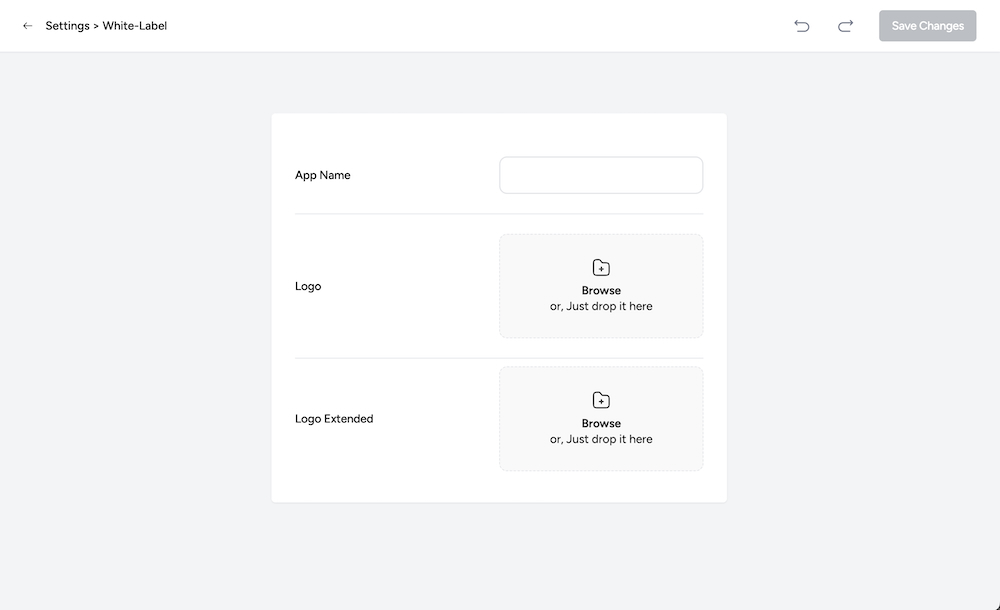
This option is for the agency owners who buy and install software on their client websites. This option helps you change Crew HRM’s name, logo, and icons. You can add a custom logo and icon and place any name you like. On the default system, you can use any WordPress-supported image format. If you have added SVG support with a plugin or custom code, that would work too.
Integrations
Google Meet – Premium Feature
This integration helps you create Google Meet links automatically from the plugin screen. It is used when you’re reviewing applicants, shortlisting them for interviews, and want to schedule a virtual call.
This configuration process is a little brief as there are multiple steps involved.
- Go to https://console.cloud.google.com/apis/dashboard to create a new project if you do not want to use an existing one.
- Now go inside the project and click Enable APIs and Services.
- Search for Google Calendar on the search box.. We will use this API as google meet is a part of this product. Click on Enable.
- Go to the Credentials section and click on Configure Consent Screen.
- If you’re testing, then you can select the External Option. This is faster, and you can always keep it in testing mode. Because this option does not require app verification, and you can add users who are allowed to test. Usually, only the primary HR email is used to create the invites and assigned as hosts. But you should eventually submit it for verification and use the internal option after a few months.
- Click on Create and add the information as mentioned in the page.
- Now add test users if you need. And then publish the app.
- Go back to the Credentials section and click on Create Credentioals and pick OAuth Client ID.
- Select Web Application from the Application Type dropdown.
- On the Google Mee settings page inside CrewHRM, there is a call back URL displayed. Copy that and add in the Authorize Redirect URIs section and click save.
- You will see a popup screen saying OAuth Client Created. There you will find all the necessary information and download them as a JSON file. This file is needed for the integration to work.
- Download the JSON file and store it in a safe place. Upload that in the plugin settings screen.
- After the upload is complete, you will see a link to click and verify. Click on that.
- As you have not opted for the Internal option, you will see a security warning. Click on the unsafe link at the bottom left corner.
- On the next screen, you will be asked to grant permissions. Click on the checkboxes and click on Continue.
- You will be taken back to CrewHRM settings screen and it would confirm that you have done everything successfully. You can now start using Google Meet integration!
Zoom Integration – Premium Feature
This is also a virtual interview solution. You can enable this along with Google Meet if your team members prefer to use both of these tools at the same time. You need to have the premium subscription of Zoom to use this feature. You need to get the necessary credentials from Zoom developer marketplace.
- Go to https://marketplace.zoom.us/develop/create
- Click on Create Server-to-Server OAuth App
- Add the app name. You can put something like recruitment calls from WordPress or CrewHRM Zoom Integration.
- On the next screen, you will see the details you need to add on the CrewHRM settings. Copy and paste them. But we are not done yet!
- We have to add some basic information on the information tab. This will help you stay upto date with the changes Zoom might bring in near future and avoid having any glitches with the integration.
- Now on the scopes section, you have to enable the meeting related acces so that CrewHRM can create the schedules easily. We recommend enabling all options under meeting, recording, webinar and user. But you can feel free to enable the options you seem okay for your organization.
- Finally, you have to click Activate. And now you’ve completed all the steps!
Please note that the premium subscription of Zoom is not included with any of our plans. You need to purchase this separately. If your organization already has premium plan, then you might not need to buy any additional subscription. Please contact the IT administrator of your organization to get access to the account set up section and get the account ID, client ID and client secret credentials.